Drafted some critters...pheasants, turkey, not sure yet what the next one will be...but the project is platters of glass with stained and enameled designs.
first
Decide on the mold to use for the platter..done
prep mold..done (since i put them away prepared ..i am ahead of the game)
Gather materials for staining
palette knife/glass palette
brush
glass stain...I use Reusche master stainer's
binder...i use squeegee oil
cut substrate blank glass
picture 1 shows the stain mixture
(the stain is finely ground chips of glass that has added flux and minerals or ore that strike the color.. it has to be chopped smooth first)
chopped and ready for the binder
here the binder has been added and mixed well
on the glass palette
then gathered back into a puddle
badger hair brushes are the key to flawless strokes...primarily I use a number 1
you can thin squeegee oil with mineral spirits ... it doesn't take much...like a drop
the set up before the oil was added ( i mixed the line up adding in the pictures)
this shows the chosen molds and my selection of stains and enamels the substrate palette and knife and brushes
the secret to great lines in addition to correct brushes is rolling the tip
this movement allows for the thickness of the line to strike without a lot of blotch
Here is the first platter a flock of pheasants
then a standing turkey...
fire one I generally slump the substrate into the mold
with the line trace (that is what the first step is called)
since they both mature at the same temperature
the line trace fires at the highest temperature
1400 F
each enamel color fires at a specific temperature as well and needs to go onto the substrate in the order of high temp to low temp
to keep what the lower temp colors are from evaporating off the glass...the chips will still be there but the mineral will leave if the temp goes to high
and you have been taken through a day in my studio ...staining glass
Tuesday, August 31, 2010
Monday, August 30, 2010
CCCHHaaannges...
Well storms have moved through here some kind of fast this afternoon!
JR barely had his cement hard enough to place some poly over it so potential hail wouldn't wreck it...it hailed but hopefully since it wasn't large hail it didn't wreck the happy beans!
This is Craig standing!!! in our beans...this rain we just received will make them really happy
for they haven't stopped growing in the pod yet
some beans are done...it depends on the variety and the number of days and heat units that particular bean needed these beans happily slurp whatever moisture they can for a couple more weeks, growing their pods..then they are done and start drying.
Weather changes tomorrow ..it is supposed to be only 80 some degrees no humidity hardly any wind..a nice day!
I get a WHOLE studio day tomorrow!!!!
and i want to thank everyone so much for being supportive and reminding me about all the great benefits enjoyed in what I do enjoy doing...and I DO! enjoy !
I am going to begin my meditations again...that always helps a person straighten them self out
get back into the groove of things...
I just need to shake myself and get back into the studio and be thankful of the fact i have all i have
ability, supplies, surroundings..imagination..dust myself off and mess the studio up!
Bea at dog in the hole studio blog has a wonderfully inspiring post..thank you!
and Dave of www.oldpaperart.blogspot.com led me to www.inbetweenthenoise.blogspot.com
another inspirational read both of the blogs with terrific art....
the point is we all help each other out of the doldrums and shaky days...the Internet takes me so many places i never would see and meet so many incredible people/artists i never would have met
thank you!
Sunday, August 29, 2010
Face It...
the last storm we had i snapped some pictures of rainbows and a few funnel looking cloud formations
i didn't upload them until today and i found this nifty cloud image...
do you see the face?
it has been a busy week....seems like everything is getting in the way of my creation energies...
when i do have a moment to go into the studio
i am just too tired
i have learned not to do artwork if i am too tired
i make too many mistakes...
consequently i am kind of in hohum funk...
i was discussing with another artfriend...what is the point anyway...
i don't have anywhere to show and sell...very few commissions dribble in...there just aren't the people out here...and what little interest there might can be i am not in their price range...
and totally misunderstood as for the price set as it is...materials are expensive! so...
other than personal pleasure..what is the point...???
do you have a point?
make me see why we still do what we do...
thanks for dropping in...
Wednesday, August 25, 2010
In My Sights
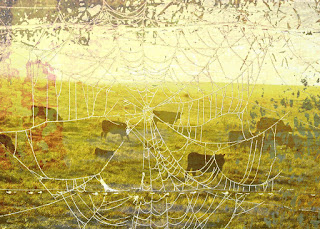
here is a practice digital image piece..i com posited 2 of my photos....which met with many unsuccessful efforts...i was going to give up for another day when during chores as i was thinking through my steps
i thought i had an aha moment...
so i came back in to give it another try
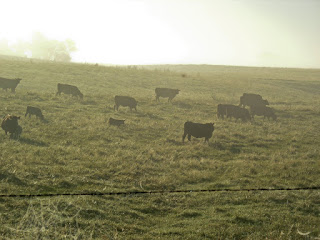
i began working in camera raw to perk up the foggy image
i did add a texture and i forget with mode i ended up using but i like the old photo look about it
then i extracted the spider from this photo and added it to the cow photo
where i liked the push pull effect giving the effect i am shooting the camera through the web
there you have it...a successful merging of layers..
it took all day off and on...but i practiced through it...
thanks for coming by
Practicing...In a Fog!
Marie's class is done...and I am practicing away with all these new "skills" I am supposed to have...she has a lot of faith!
I took a picture from my files of a foggy hill...
In camera raw i popped it up some but I didn't want to lose the foggy essence...i like that..
I cropped it and used the dry brush effect...to kind of art it up some...i love grungy edges and I tried and tried to download and use some free ones...i FINALLY figured out how to get them to load into the program...but i haven't actually been able to open an image I have downloaded
Except the ones from class..this is an texture we used in week three of class it gives me the grunge effect i am after..
i erased!!! the part i didn't want to cover the image (successfully!) then i clipped the mask together! (successfully)
so all in all i practiced many techniques...and it didn't take me 2 days!!!
i hardly referenced the notes either...i am on a cloud
i still have to figure how to use downloaded things...but that will come...
thanks for coming by
I took a picture from my files of a foggy hill...
In camera raw i popped it up some but I didn't want to lose the foggy essence...i like that..
I cropped it and used the dry brush effect...to kind of art it up some...i love grungy edges and I tried and tried to download and use some free ones...i FINALLY figured out how to get them to load into the program...but i haven't actually been able to open an image I have downloaded
Except the ones from class..this is an texture we used in week three of class it gives me the grunge effect i am after..
i erased!!! the part i didn't want to cover the image (successfully!) then i clipped the mask together! (successfully)
so all in all i practiced many techniques...and it didn't take me 2 days!!!
i hardly referenced the notes either...i am on a cloud
i still have to figure how to use downloaded things...but that will come...
thanks for coming by
Sunday, August 22, 2010
It Is FINALLY!! Clicking!
Marie Otero is offering digital magic an online class to learn those photshop secrets a lot of you have figured out
I am a slow curve after several books (and they were helpful) another on line class (and she is an excellent instructor as well) it is finally connecting for me...this is week 3 exercise
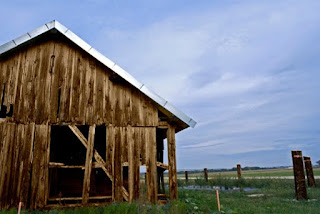
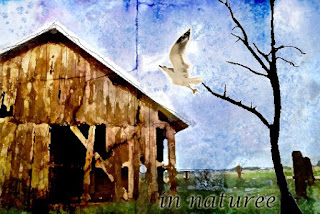
Marie's barn image we had to manipulate in class.
had 3 textures 2 brushes and 2 lassoed images then text
this is my result..except i spelled incorrectly..oh well
not too bad tho eh!!
of course this is following the step by step instruction
then
I took my own stock photo
a stone outbuilding
I added Maries textures but omitted the text step
and this is what I achieved
i love the look!!!
thank you marie for helping it to finally make the sense i needed to achieve some results!
Thursday, August 19, 2010
Student Final Project
Gather a hand of appluse for shayla, 14...has finished her last project with me of the summer
they start school in a couple of weeks and it is time to get ready...
Here is where she ended last weeks lesson..
mr tiger was fleshed out fairly well..
After a bit of refresher on different ways to use the paintbrush we finished him up today...
I edited the top picture in camera raw...which gives the color richer version in person sees
isn't he fierce looking!
Job well done...now practice everyday!
Saturday, August 14, 2010
WOW!
I loaded these backwards...of course!
but look at the difference
the top picture i took into camera raw and adjusted the saturations...it looks more like an in person view
the other picture shows the "automatic" fix that photoshop has in the enhance box
which is a nice enhancement..however the RAW options enhances the image even better...or at least i think it does!
The Captain
Thursday, August 12, 2010
In RAW!...baaaby
This is my homework submission for Marie's Digital Magic class on line. We are in week 2
working in camera RAW!
you open the image up and tweak all the sliders until you think the image has improved or done what you would like
save it...and in my opinion I think the image looks a LOT better.
When had the automatic tweaker do its thing you didn't get a lot of color add...and you didn't see the red heads on the birds...they are there!
you have to look reaaaaally close!
I probably should have cropped the image
but I was in experimental mode...
like magic isn't it!
:)
I have NO idea why the reworked image doesn't enlarge..i will ask Marie!
y'all this is from an online class
digital magic
by marie otero
over on the side bar you can follow the image link
camera raw is a feature of photoshop elements....
there is also a RAW element that stands alone
they do different things..
this post is about camera raw...
check out maries class
we are approaching week 3 she might still offer an opening..
if she does
her class is full of information and easy instructions that are in pdf and video
maybe she will offer it again
if not right now there is an opening
i hope you check her out!
Monday, August 9, 2010
Fooooogggggg again
Sunday, August 8, 2010
Let Us Shine
I am not really feeling all sunny today...tired and getting burned out of all this outside work..
but on august 4 exactly! because I had been here just the night before
and these were closed still
the sunflowers began sunning
they have already begun getting darker centers
it will be just another few days and they begin their big drying out phase
but i shall get more pictures before they start to turn
I hope they brighten your day...happy flowers aren't they!
WOW I didn't mispell anything...that rarely happens
;)
Friday, August 6, 2010
Grouped
Thursday, August 5, 2010
Playing With Chalk
Tuesday, August 3, 2010
Alonzo or Elmira...the twins
One of the twins either Alonzo or Elmira...i have been trying to get them pictured together
but they seem to know this and elude me...
anyway
these twins are Estelle's youngest child's daughters...children
they were born in the tree grove just north of the building and i see them everyday
either breakfasting on the south hill
or in the Milo patch just north of their home
coming home from spraying weeds this morning at the ranch (my other job) i spied him/her in the ditch and i waited ...finally they came on out and i got this picture
they are growing up tho and i am not sure how much longer they have their spots
the other twin was already across the road
this season i have spotted 4 sets of twins on the property
oh i know which one is which and i am not seeing them coming past twice and three times
they have differing bunks...
today i began Bo's portrait...sailing the 7 seas...he is quite the captain of the ship!
thank you for stopping by!!
Monday, August 2, 2010
The KIss...
another practice for the portrait journal...all but the first picture should enlarge..
this is one of my favorite pictures of Sarah...the mouth was not easy
and i am here to tell you all these blonds aren't that easy either
but here we go
acrylics/on gesso'ed watercolor canvas
here the beginning gets drafted
the eyes just weren't right so i redid them...i might have messed them up
this is one of my favorite pictures of Sarah...the mouth was not easy
and i am here to tell you all these blonds aren't that easy either
but here we go
acrylics/on gesso'ed watercolor canvas
here the beginning gets drafted
the eyes just weren't right so i redid them...i might have messed them up
this picture of the painting doesn't show the painting like it shows in person..i don't think it is just the glare....
but i am posting anyway...
thanks for looking
Sunday, August 1, 2010
Bird Song...
When i went to spray this property Saturday there was this happy little bird...each time i passed by it just chirped and chirped but did not leave...
well since i take the camera everywhere...i went back to the truck and got the camera out
i figured for sure! when i wanted a picture it would leave...so i began taking pictures kind of far away
but she let me get closer and closer
and closer
and closer
the whole time, she is singing away!!
I am standing right next to her here and I do not have the zoom on!
i was talking to her telling her how pretty she was
obviously this is a young bird not messed with yet to be so un afraid
she would talk back to me and sing
I am really amazed that I was able to get so close
isn't she a beautiful purple marten!!!!
Subscribe to:
Posts (Atom)